Friday, December 2, 2011

Aftermath of Southern California Wind Storm December 1st 2011

I have lived on the east coast and none of the hurricanes I experienced were as bad as the wind storm I just experienced.  Luckily our power was restored quickly after we lost power 6 times.  We are on the same power grid as the hospital so we always seem to get restored first.   It started late wednesday night around pm and just intensified.  I couldn't see anything flying about but I could hear the tents of the Christmas tree lot across the street being ripped off poles clamouring, sirens all night trees and  branches breaking the whole house shaking in the 97 mph winds.  It was the scariest night ever zero sleep.  In the morning this is what we found just in the one block where I live.  We couldn't get out we were being diverted to other streets and I drove around in a loop about 1 mile square it took me an hour.
Here are the pictures.  I don't think they do the destruction justice.


Friday, November 4, 2011

Polymer Clay Flowers

Don't forget tomorrow is the Los Altos Craft Fair everyone.  It runs from 10am to 3 pm.  You will be able to purchase handmade and manufactured products, baked goods, lunch and raffle tickets.  It is a fun day.  It takes place at the United Methodist Church.  The address is 5950 E. Willow (at Woodruff), Long Beach, CA  phone # is 562-598-2451.  Get a start on your holiday shopping and help a good cause.

I made these flowers out of Polymer Clay.  Don't they make cute earrings.  I made a set for one of my friends at work.  I recycled an old Boy Scout Pin for a backing to make a rose lapel pin and made matching earrings.  I don't have a picture unfortunately they were white white with a pink and green center.  These are not hard or expensive to make.  You just need to pick a color of polymer clay that you like.  You can buy these often on sale for 50% off from Michaels or Joann's but their every day price is about $2.79 for one package and you can make dozens of earrings with one package.  You will have to play with the clay and you can always start over.  This clay will last a long time even while open to the air.  It is great.  You can make flat shapes and put them together without gluing before baking and they will adhere without the use of glue.  These roses are a bit deep to use on a scrapbook page or a card but once the clay has been baked you can actually cut off some excess without compromising the rose shape.  You can cut them to make a flat surface for gluing the earring, bracelet, bobby pin or necklace platform.    I start by pinching off a small amount of clay and kneading it to make it softer and more plyable.  I then pinch off about a pettit pea size piece and roll it into a ball.  I squeeze it flat between my thumb and forefinger.  I pull it from my finger and roll it up for the center of the rose.  You continue this step and add (build) to your rose by placing the next petal  on the outside of the last.  You can see in the photo below  how the petals are placed.  The clay petals will cling to each other so do be careful before you commit to it's placement.  Continue to build your rose to the size desired.  I usually have between 5 and 7 petals in my roses.  I usually cut off the excess with a clay knife place on a oven safe plate and bake at 275 degrees for about 10 - 15 minutes for each 1/4" of thickness.  I ususally bake my roses for 10 minutes.  I have also made blackeyed susans, daisies, poinsettas and beads with polymer clay.  It is fun to play with, enjoy!  Julie

Hand Sculpted Rose Polymer Clay Post Earrings Vintage Inspired

Tuesday, October 18, 2011

Forget you not!

I want to apologize for not posting a thing so far in October.  I do have grandiose plans but they never seem to work out the way I want.  Of course I am not in charge of my life, but I keep forgetting.  I will get better about posting after the first week of November. 

I have a craft show in Long Beach on November 5th.  I am busy trying to make things to sell to the early holiday shoppers. I really wish I was a fulltime artist/crafter.  It is at the Methodist Church at the corner of Willow and Woodruff.  The address is 5950 E Willow, Long Beach, CA.  If you are local or don't mind taking a little drive come down and see all the ladies and gents that are selling their wares.  This is one craft fair that does not charge admission and you can get some lunch or baked goods and support the ladies of UMW by buying raffle tickets.  This will be the third year I have participated.  It is a fun day. 

I wanted to tell you that I had a couple of nice shout outs.  I consider myself blessed.  I think the Lord wants me to succeed with this adventure I am on.  Here are a couple of links to some other blogs that have recently recognized my work and shop.  The first blog has my Sunflower Trinket Box and the second blog is a sponsor thank you.  I sent them 50 Mummy wrappers for their swag bags for the So Cal Social that took place on October 8th.  Very nice of them.  Check them out.  Their blogs are much more sophisticated than mine.  Have fun!  

http://www.acollectivejournal.blogspot.com/


http://socalsocial.blogspot.com/2011/10/sponsor-highlight-highland-inspirations.html


Julie

Friday, September 30, 2011

Make Your Own Flowers 1

Hello Everyone,

If you are like me your stash of crafting supplies has out grown it's storage space.  I know mine has.  I have to come up with ways to stop spending money on supplies.  I have a rather large Rubber Maid container full of flowers from many different manufactures.  I bought most of them years ago when you could get 60 flowers for $5.99.  Now, I go into the shops and see the flowers available for cards and scrapbooks and have to pay $5.99 for just a few blooms.  I just can't afford these flowers and be competitive on Etsy.  If I want to make  2 dozen  Christmas cards with 3 poinsettas each, I'll go broke.  I don't want to stiffle my creativity that way.  So, what will I do?   I will make my own.  This is going to be a series of Blogs explaining how to make different kinds of flowers made from fabric, paper and more.  I hope this helps you as it has helped me.  Now I have another problem.  What to do with with all those other flowers?

Here are some easy to follow instructions for some flowers made of fabric scraps.

Instructions

Supplies


  • scraps of fabric
  • scissors
  • thread
  • hand-sewing needle
  • button (optional)
  • fray check (optional)

  1. Make Fabric Flowers

    • 1
      Cut two 4 inch squares of fabric, two 3 inch squares of fabric and two 2 inch squares of fabric.
    • 2
      Fold each square of fabric in half, then fold it in half again.
    • 3
      Trim the unfolded edges of the fabric into a scalloped shape. (The scallops don't have to be perfectly even to make a nice flower shape.)
    • 4
      Unfold the fabric, then cut slits between the scallops toward the center of the flower, without cutting the petals all the way apart. These slits will make it easier to fluff out the petals and make the flower more three-dimensional.
    • 5
      Place the two large flower pieces on top of each other. Pull the petals of the lower flower up through the slits between the upper petals, to make the flower petals fluffier.
    • 6
      Repeat step 5 with the pair of medium flower petals, and the pair of small flower petals.
    • 7
      Stack the flower petal pairs on top of each other, with the largest petals on the bottom and the smallest petals on the top. Make sure the petal pairs are centered.
    • 8
      Stitch the layers of the flower together through the center, using a few small hand stitches. Add a button to the center of the flower if you wish.
Have fun everyone.  Stay tuned there are more to come.  See you next time. Julie

Tuesday, September 20, 2011

New Tim Holtz Arrived Yesterday

I had completely forgotten that I preordered the Tim Holtz fall/leaf border.  When I opened the package I was so happy.  Even though I had several kits to put together I really wanted to play with it.  I got the kits done and started to put one together.  It turned out really nice.  I couldn't sleep last night, so I put it in my Etsy shop at  http://www.etsy.com/listing/82166389/lovely-fall-border-for-halloween

I'll tell you how I got the leaves to look like they are really are changing. 


If you plan on making a whole lot of leaves get the cardstock of your choice. I used 8.5 x 11inch piece of yellow or gold.  Take a warm red Color Box Chalk and swipe it gently as you don't want the sponge to fall off.  It doesn't matter if you can actually see the shape of the sponge because when you punch or die cut the paper you won't see it. You will just see the random color on the leaf.  They I use some pastel olive and more warm red to go around the edges and then a chestnut roan on just the tips.  They look great, don't they!

Take a look. I just love fall colors!

Sunday, September 18, 2011

Oh Happy Day!

Wow!  What a day.  Today was my most successful class at Pages from the Heart in Monrovia.  We had 22 ladies sign up for the Halloween Treat Boxes class and one that walked in thinking she had signed up.  We were able to accomodate her so now I think I hold the record for the largest class at Pages.   It was a lot of work but the comments and smiles across every face just made my day.   Here are some photos from today's class.  I posted this class on my very first blog.  We had some real fun and met some new friends in the process.  Enjoy!

                                                                      Busy, busy

                                                                   19 people plus 4 kits

                                                                  This is Crazy fun!

                                                       Pages has nice space and product!

The gray haired lady with the french braid is me!
Some of the items we made today are in my Etsy shop at http://www.highlandinspirations.etsy.com/
I also have a download for the Mummy Wrapper by far the favorite treat box. 
Hope to see you soon!  Julie

Wednesday, September 14, 2011

Back to School

It isn't just the kids that went back to school, I enrolled myself into a art class.  It was a mixed media torn paper class.  I would have called it a collage, this one has a Halloween theme. Part of what attracted me to this class is my inability to throw away a scrap of paper. I figured besides cutting out little die cuts I could use every little scrap of paper I own to make some lovely pieces of art.  It was my intent to take pictures of every step and share them with you but alas that did not happen.  Last night was the worst traffic nightmare.  It took two hours for me to get from work to class.  I was in a rush to catch up and unfortunately I couldn't take the photos.  I can try to give you the steps. 

We started with a piece of 8.5 x 11 inch cardboard.  We used Modge Podge to glue everything down. It dries clear and will adhere almost everything  to your surface.  Then you start to modge podge your background.  The instructor said every piece should be torn no clean edges and use smaller pieces so they don't create bubbles.  Lay your modge podge down then your torn piece of paper then modge podge again over the top of the piece of paper and using this method build yourself a back ground.  We used those foam brushes to apply the modge podge.   It is ok to go off the edges as you can cut away the excess.  Don't put anything of real interest close to edges as when you frame your art you will probably lose 1/2 inch all around the sides.  Then you start to lay down your ribbons and laces.  Reall goop them up.  You may have to put some wax paper over it and set something heavy on top for some laces  and later flowers ect that aren't cooperative.  Then just remove the wax paper from your piece.   I had specific pieces that had clean edges as you will notice I used a vellum ghost but he is hard to see.  I will go over him with a little acrylic paint to make him pop.  I also used a glittery tree that I have been saving in my stash for years.  It was on plastic.  It won't come up because I have glued and put other elements on top of it but I wouldn't recommend using that type of element.  It is a free for all and I had a lot fun.  The other students were a hoot.  If you have question feel free to ask.  I am not quite done with my Halloween art yet because I need to go buy some Modge Podge.

Thanks for visiting!  Julie

Saturday, September 10, 2011

The Estate Sale Next Door

As I was walking our dog Puck this morning at 7am, I noticed a man trying to post Estate Sale signs at the Condos next to us.  I was excited I hardly ever get the chance to go to a yard sale or estate sale and here was one only steps away.  I waited for an hour until they opened and wandered around and noticed so many things about the nameless person whose things I was inspecting.  She was a crafter, she loved working with artificial flowers.  She was like me and had vintage patterns, spools of thread, ribbon, and tulle.  In an earlier life she had quite a lifestyle, beaded gowns and real fox stoles, she liked to play bridge.  It made me sad to think if she had children, that they were letting strangers sell her things.

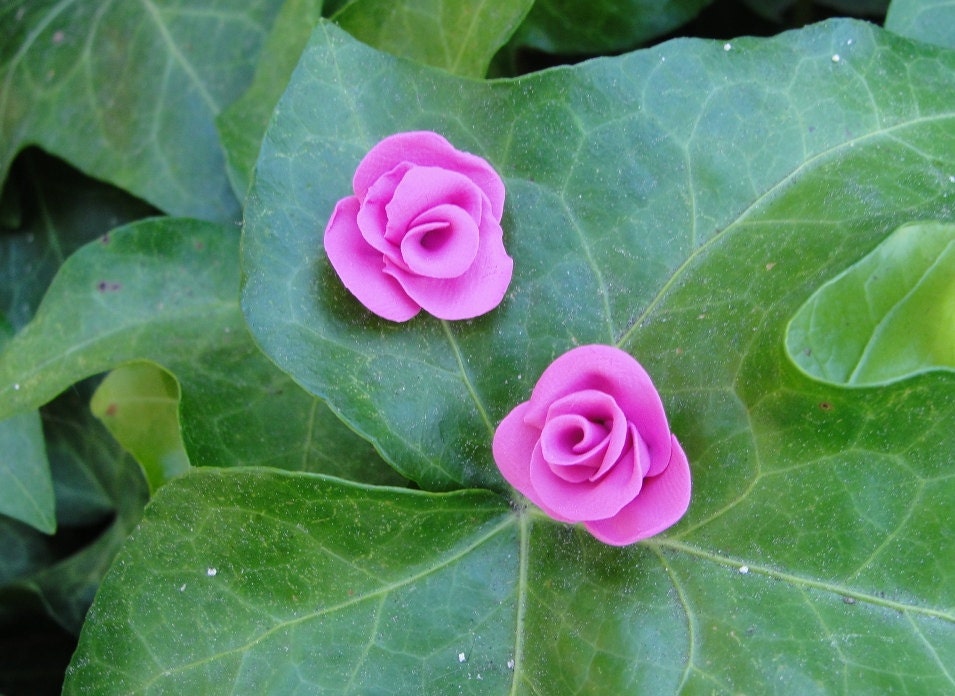
On a happier note I found some really wonderful finds.  I finally found some wool sweaters that I am going to felt.  I am sure that she would be happy to know that her red sweater dress will be on some of the finest Christmas trees this year, and some of her rhinestone jewelry will be walking down the aisle on Amy's Wedding day.   Out of my dispair comes hope and promise.  You will be able to find some of these great bits and pieces in my Etsy Shop at http://www.highlandinspirations.etsy.com/

Here are some instructions on how to felt a sweater. 


  • 1 Find a 100 percent wool sweater. You can find wool sweaters at the Salvation Army and other thrift stores very inexpensively. If you plan to wear the felted sweater, be sure to buy a couple of sizes larger than you normally wear, as the sweater will shrink in the felting process.


  • 2
    Wash your sweater in the washing machine, either alone or with a towel or pair of jeans. Wash the sweater on the hot/cold setting with a small amount of liquid or powder detergent, about 1/4 cup.


  • 3
    Dry the sweater and any other items (if desired) on the hottest setting your dryer offers. Be sure to dry the sweater completely, then wash and dry the sweater two more times.


  • 4
    Remove the sweater from the dryer after repeating the wash/dry cycle three times. Check the sweater to determine if it has felted properly; take a pair of scissors and snip a very small indentation into an inconspicuous area in the hem of the sweater. If it does not fray, it has completed the felting process. If it does fray, repeat the wash/dry cycle one more time.


  • I bought a sweater dress and sweater for $2.50. I am hoping to get a lot of flowers and ornaments out of them.  It was a good buy and it won't go in the landfill.  I'll post some pictures of my felted products once I get them made. 

    Wish me luck!  Julie


    Monday, September 5, 2011

    Labor Day End of Summer 2011

    Is it really the end of summer?  Take a look at this photo the perfect end of Summer.  It was 97 degrees with high humidity.  We got in for 1$ and bought drinks after 1pm for $1 too.

    Rides

    People
    LOOK! A 3D Quilling Entry took 1st place.

    We (my husband and I) had a great time walking around and just spending some time together.
    I hope you all had as nice a day off as we did.

    Talk to you soon.  Julie

    Sunday, September 4, 2011

    Addicted to Paper

    In my intro yesterday I told you that I am a crafter.  I also sew, crochet, quilt, and I am addicted to paper.  I love making cards, scrapbooking and making all kinds of paper related projects.  I am learning a new skill called Quilling.  I have seen embellishments using quilling but they are usually one piece and not very large.  I took a class (mostly because a friend was teaching it) but everything turned out so cute I had to buy some more stuff.  That is the bane of my existance, trying (not very well) to stop buying crafting stuff.   I bought a book and there are some really cute fall things, but of course I only have christmas colors red, green, white, and bright yellow for the centers of poinsettias.  So, to try to stay within my budget for the month I decided to cut my own papers using the 65 # paper packs that I've purchased at Michael's and Joann's.  The paper is thicker but it did work.  I had fall colors so I was able to continue with my project.  I saved money on materials, and gasoline (Michaels is 20 minutes one way) and I didn't have to wait a week to get the colors I needed.  I have to say that my strips were not as uniform and if I had the time I would probably order them, but you can easily sub the light weight cardstock in your stash in a pinch.   Here are some of the flowers and leaves I was experimenting making. 


    Oops I forgot that I made a little acorn too.  I like the way they turned out, but I have to make them smaller for my napkin rings for Thanksgiving.  The largest leaf is about  3.25 inches or 8 cm The book calls it a Sycamore leaf, the brown leaf is 1.75 inches or 4.3cm and is supposed to be from an Oak, the acorn is .75 inches or 2 cm, the small red flower is a scarlet pimpernel and 1 inch or 2.5cm in diameter, The large golden fringed flower is just about 2 inches or 5cm. That isn't all of the sizes but it gives you an idea of the  size of the others.  I will be making projects with these and offering them in my Etsy shop at www.etsy.com/shop/highlandinspirations very soon so you can use them in your own fall projects.

    Thanks again for visiting.  Julie
     

    Saturday, September 3, 2011

    An Introduction is in Order

    Hi my name is Julie and have been thinking about this blog for a long time.  Up until this moment I have been too chicken to start it.  I asked myself are you crazy, what will I say, what can I contribute? I finally decided today is the day, I will be brave!  

    I live in Southern California.  I have two grown children and a wonderful supportive husband.  I work full time in a job that is outside the realm of creativity.  Luckily, I have a burning need to create and have happily enjoyed crafting since I was a young girl.  Take my word on this I have several decades of experience. 

    Until a year ago I was giving away my labors of love as gifts, raffle prizes, or using them in my own home.  I have an Etsy Shop at
    http://www.highlandinspirations.etsy.com/
    where I sell my fabric and paper arts.  Of course part of starting this blog was to help promote my Etsy shop, Card, and Scapbooking classes, but I want it to be so much more.  I want to be able to share great finds and techniques while having a little fun.  These could include eco, money, and time saving tips. 

    Who knows for sure, this blog could take on a life of its own.  Come with me on this grand adventure and with God's help I won't be afraid anymore.


     My Adorable Halloween Treat Boxes Class At Pages from the Heart in Monrovia, California.
    Call them if you want to join us on Sept 18th.  There are still a few spaces open.


    My Uncommon Woman 2 page layout class on October 2nd at Pages from the Heart.
    Call them to join us.  I made this for my Daughter's millitary pictures but Pages is using it as their Breast cancer Awareness Layout.  It has hidden journaling and extra Photo mats under the unique over the sleeve flourish shaped panels.

    Don't forget to visit my shop one or two of the Halloween Treat Boxes are available for purchase at http://www.highlandinspirations.etsy.com/

    Thanks for visiting, until next time.

    Julie